Cloning a large git project in the WSL2 environment can be slow without a proxy, so I explored how to route WSL2 through Windows’ proxy client.
Differences in Networking between WSL1 and WSL2
In the WSL1 era, since the Linux subsystem and Windows shared network ports, accessing Windows’ proxy was straightforward. For instance, if the Windows proxy client was listening on port 8000, you could simply execute the following command in the Linux subsystem to route requests through the proxy:
export ALL_PROXY="http://127.0.0.1:8000"
However, WSL2 runs on Hyper-V, which means the Linux subsystem and Windows are treated as two separate machines on the network. To access Windows from the Linux subsystem, you first need to find Windows’ IP address.
Configuring WSL2 to Access Windows’ Proxy
There are two key steps:
- The proxy configured in WSL2 should point to Windows’ IP;
- The proxy client on Windows needs to allow requests from the local network;
Since the Linux subsystem accesses the network through Windows, its gateway and DNS server point to Windows. Based on these characteristics, we can retrieve Windows’ IP address.
For example, in the Ubuntu subsystem, you can view the DNS server IP using cat /etc/resolv.conf.
# This file was automatically generated by WSL. To stop
automatic generation of this file, add the following entry to /etc/wsl.conf:# [network]# generateResolvConf = falsenameserver 172.19.80.1
The DNS server is 172.19.80.1. Configure the proxy using the environment variable ALL_PROXY:
export ALL_PROXY="http://172.19.80.1:7890"
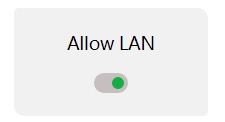
Port 7890 is where the proxy client runs on Windows. Remember to configure the Windows proxy client to allow local network requests.
One-Click Configuration Script
You can write the above process into a bash script for easy one-click proxy configuration:
#!/bin/bash
host_ip=$(cat /etc/resolv.conf |grep "nameserver" |cut -f 2 -d " ")
export ALL_PROXY="http://$host_ip:7890"
The script uses cat /etc/resolv.conf to get the DNS server, which is Windows’ IP, extracts the IP part, appends the proxy client’s port (mine is 7890, modify as needed), and writes it into the environment variable using export.
You can also download the script from here .proxyrc. To activate it, simply use source .proxyrc.