Previously, I developed a Chrome extension that converts URLs into QR codes and wanted to use a similar extension in Safari. After searching, it seemed there wasn’t one available, so I decided to create a Safari extension myself and document the process.
Obtaining a Developer Certificate
To create a Safari extension, you first need to generate a developer certificate. Visit the Apple Developer Center and join the Safari Developer Program, which is free. Once you’re part of the developer program, you can generate a certificate by visiting Certificates, Identifiers & Profiles, clicking the plus sign in the top right corner, and generating a developer certificate. After successfully creating it, download the certificate to your local machine and import it into Keychain Access.
Creating an Extension in Safari
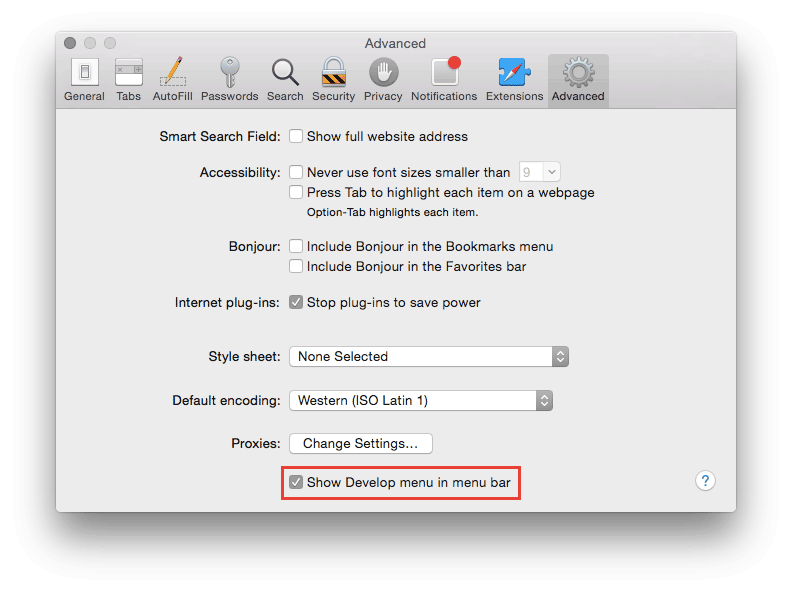
Open Safari and select Safari—Preferences-Advanced from the menu, then check the Show Develop menu in menu bar option at the bottom, as shown in the image.
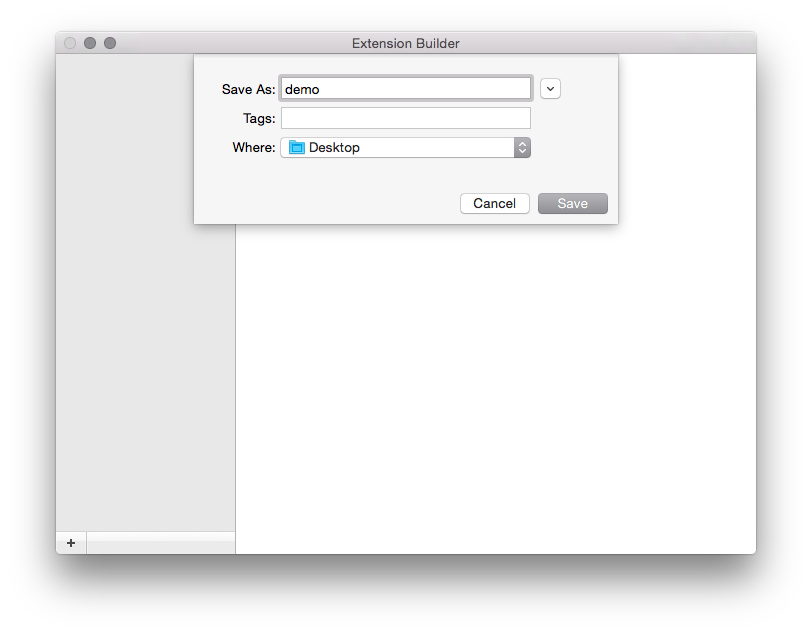
The Develop menu will now appear in the menu bar. Select Develop-Show Extension Builder to open the extension editor, click the + in the bottom left corner, and choose New Extension, saving it to a location (e.g., Desktop).
A demo.safariextension folder will appear in the Desktop folder. This folder contains the root directory of the Safari extension we generated. If the developer certificate was correctly imported earlier, the Safari developer ID will appear in the extension’s description.

Editing Basic Extension Information
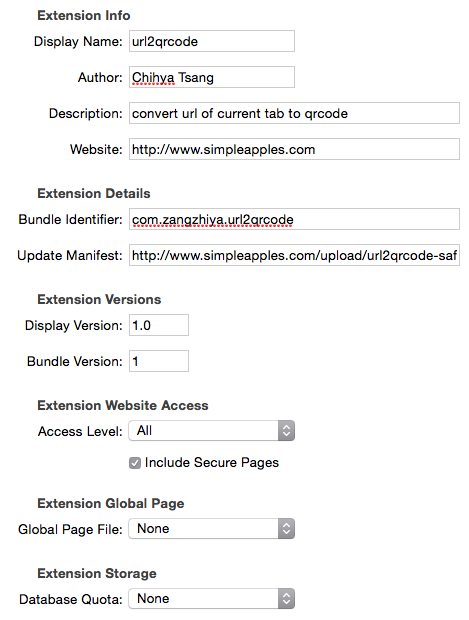
Once the extension is created, there are several fields to fill out, starting with the basic information of the extension.
- Display Name: The display name of the extension
- Author: Author’s name
- Description: Plugin description
- Website: Plugin website
- Bundle Identifier: A unique ID needs to be filled in here
- Update Manifest: This requires the address of a plist format file. Apple will periodically check the Version in this address, and if there is an update, it will access the plugin’s download address to update the plugin. However, if the plugin is for personal use and not submitted to the Safari Extensions Gallery, this field can be left blank. The plist file format is as follows:
<?xml version="1.0" encoding="UTF-8"?>
<!DOCTYPE plist PUBLIC "-//Apple//DTD PLIST 1.0//EN" "http://www.apple.com/DTDs/PropertyList-1.0.dtd">
<plist version="1.0">
<dict>
   <key>Extension Updates</key>
   <array>
     <dict>
       <key>CFBundleIdentifier</key>
       <string>com.zangzhiya.url2qrcode</string>
       <key>Developer Identifier</key>
       <string>Developer ID</string>
       <key>CFBundleVersion</key>
       <string>1</string>
       <key>CFBundleShortVersionString</key>
       <string>1.0</string>
       <key>URL</key>
       <string>http://simpleapples.com/images/url2qrcode-safari/url2qrcode.safariextz</string>
     </dict>
   </array>
</dict>
</plist>
- Access Level: Here you need to select the plugin’s access level to the page. For example, for the URL to QR code plugin we are creating, which requires access to the current tab’s URL, you need to select ALL.
Adding an Icon
Our extension currently lacks an icon, and Safari assigns a default compass icon. Adding an icon is simple: place a 16px * 16px PNG format image in the root directory of the extension, and Safari will automatically set it as the icon.
Adding Toolbar Item and Popovers
Let’s take a look at the completed state of this extension, as shown in the image.
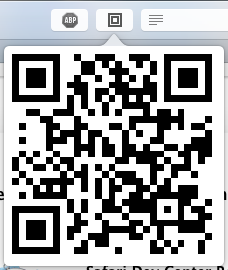
You can see that this plugin consists of two parts: a toolbar button, known as a Toolbar Item in Safari, and a layer that pops up when the button is clicked, which is a Popover, similar to a Popup in Chrome. This Popover is also an HTML page.
Next, continue editing in the Safari Extension Builder by adding a Toolbar Item and a Popover, as shown in the image.
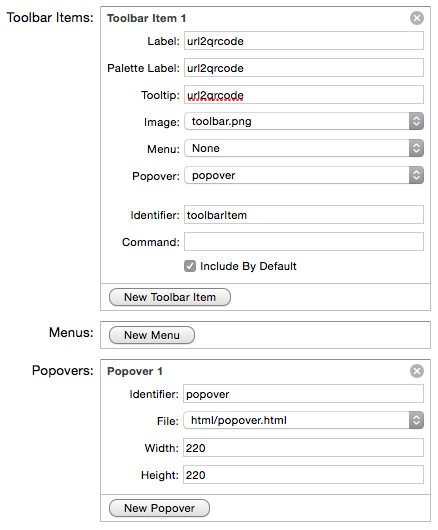
The image for the Toolbar Item must be an 8-bit 16px * 16px transparent background black-and-white PNG image (a rather cumbersome requirement), and the Popover needs to be an HTML file. The paths here are relative to the extension folder. At this point, the plugin configuration work is complete.
Programming
You can view the code for this extension on my GitHub. The Safari API used (to get the current page URL) can be found in the Safari Developer Library, which contains very detailed information.
Packaging
Once the extension development is complete, you can click Build Package in the Safari Extension Builder to package it. The packaged file will be in the safariextz format, which can be installed by double-clicking. If you don’t want to submit it to the Safari Extension Gallery, you can directly copy this file for others to install.