TestFlight has been integrated into iTunes Connect by Apple, making it very convenient to conduct beta testing for apps. Here’s an introduction on how to use TestFlight for testing, along with some minor issues you might encounter.
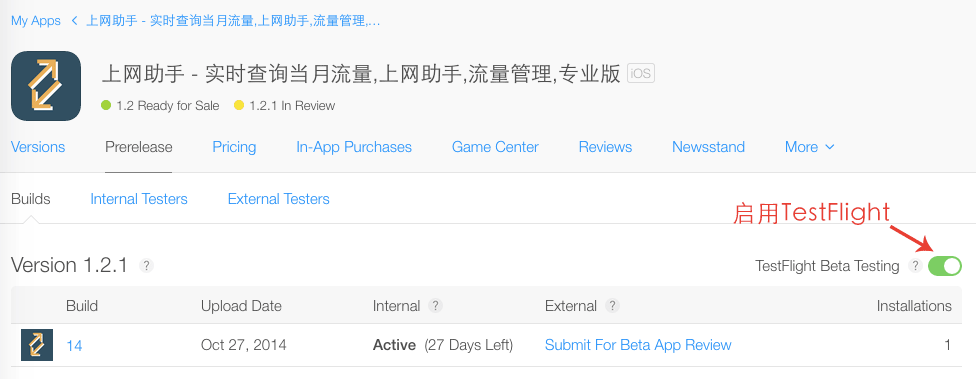
First, you need to enable TestFlight in iTunes Connect. You can decide whether to enable TestFlight for a specific version of each app. Go to iTunes Connect -> My Apps -> a specific app -> Prerelease, and in the upper right corner of the uploaded build, turn on the TestFlight switch. This will start TestFlight for that version.
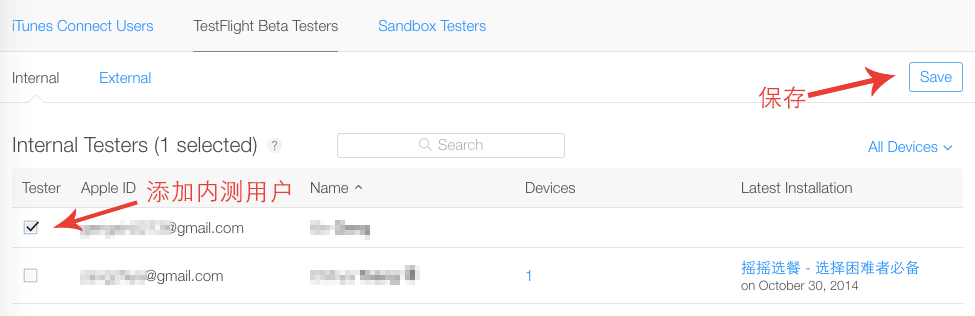
With an app ready for testing, you also need test users. There are two types of TestFlight test users: Internal Testers, with a maximum of 25, and External Testers, with a maximum of 1000. Internal testers need to first become iTunes Connect Users, while external testers only need to provide their Apple ID. Public testing requires approval from the Apple Review team. Let’s take adding an internal tester as an example: go to iTunes Connect -> Users and Roles -> iTunes Connect Users, and first add an iTunes Connect User. The reason for adding an iTunes Connect User is that TestFlight test users must be iTunes Connect Users, and their role must be Admin or Technical. After adding, the user will receive an invitation email, and clicking the link in the email will activate them as an iTunes Connect User. Go to iTunes Connect -> Users and Roles -> TestFlight Beta Testers, and the activated iTunes Connect User will appear here. Select and click save in the upper right corner, and this user will become an internal tester.
With internal testers and a test app ready, the next step is to associate them. Go to iTunes Connect -> My Apps -> a specific app -> Prerelease -> Internal Testers, where available internal testers will be displayed. Check the users and click Invite in the upper right corner, and Apple will send an invitation email to that email address. Next, you need to install TestFlight on the device you want to test. Once installed, TestFlight will automatically bind to the Apple ID logged in on the current device. Here, you may notice that the test app does not appear in TestFlight. Through testing, it was found that you must click the link in the invitation email using the built-in iOS mail client to be redirected to TestFlight for app installation. This is a particularly frustrating aspect of TestFlight. You can forward the invitation email to the email account linked to the built-in mail client, and then click the invitation link in the built-in mail client to open TestFlight.
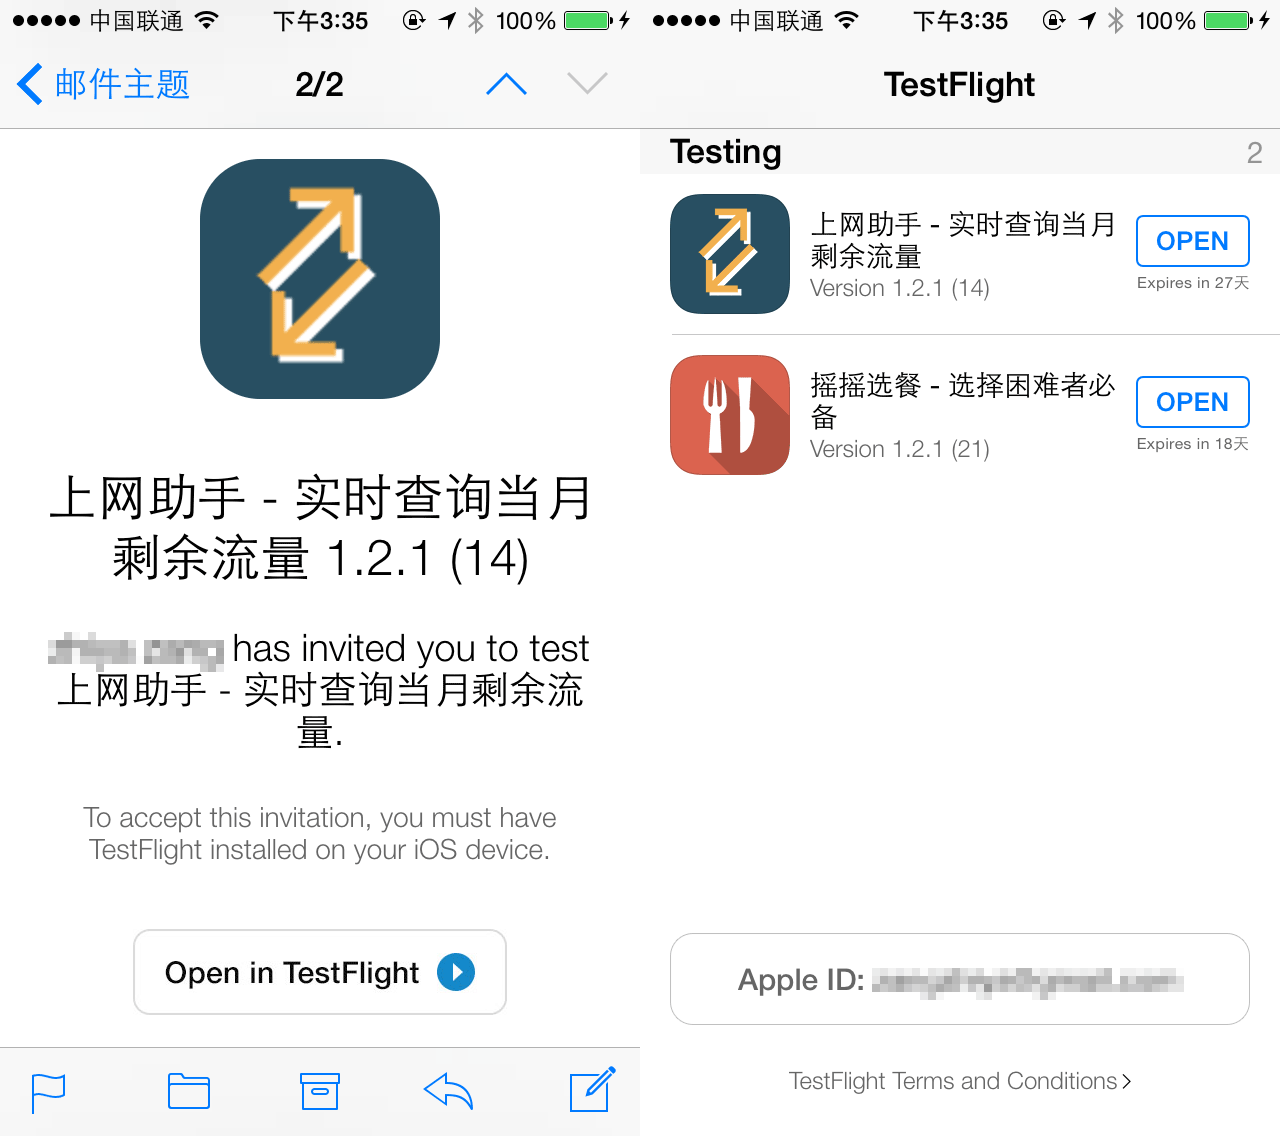
After clicking the link, you will be automatically redirected to TestFlight. Click Install to install the app, and upon re-entering TestFlight, you will see the installed test app.